Notebook

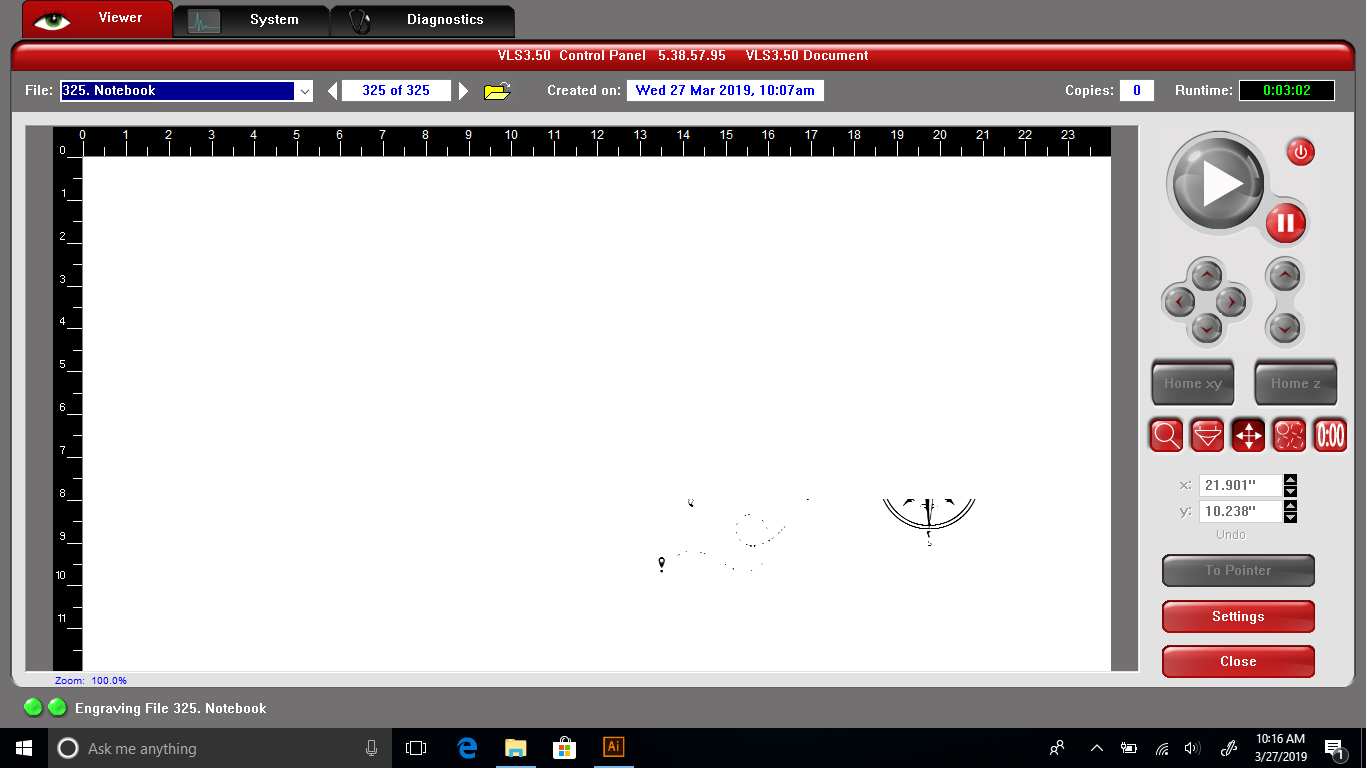
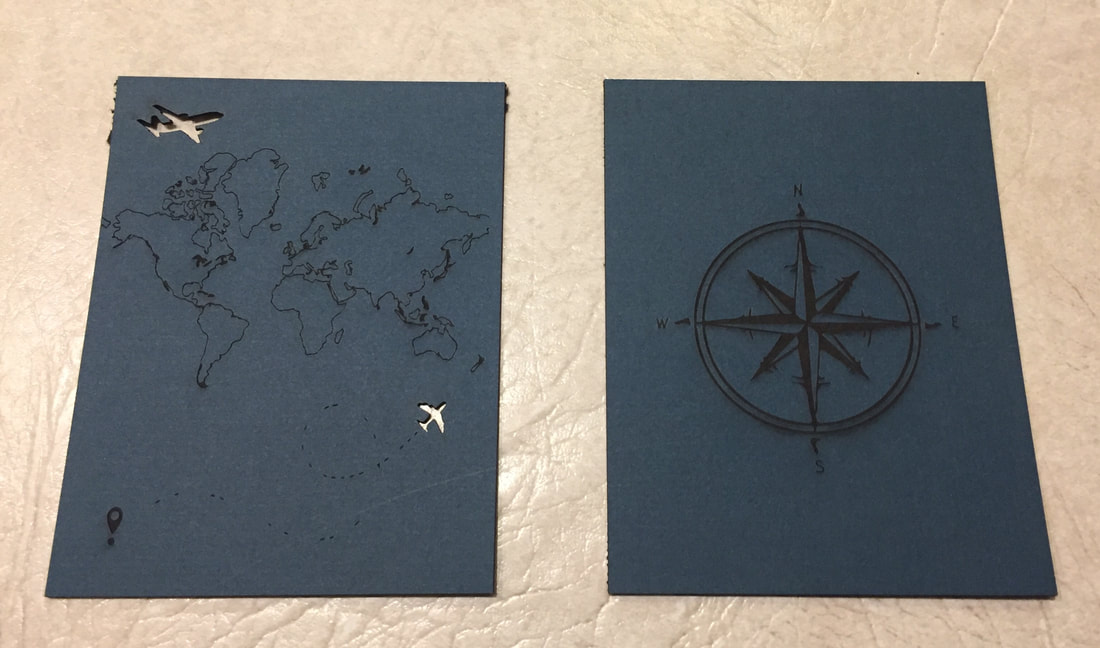
My idea with the design for the notebook was always going to be related to traveling. I want to travel a lot when i am older so i was thinking about doing something with the world like what I did with the key chain. At first I wanted it to be a plane going around a globe but I did not find any pictures that worked well that I liked enough. So I changed it to just have two planes on the top and bottom of a flat world map for the front. Then for the back I wanted to keep the same kind of design with traveling so I went and chose a picture of a compass for the back of the notebook
To start creating it I started in Illustrator by making a 12x12 white page. Then I made two rectangles that I wanted the two sides of the notebook to be. For the design I went to google and found a picture of the world, coping and pasting it onto Illustrator and editing it to get rid of the back round. For the front of the notebook we needed something to be engraved and cut out and since the world would be engraved I found a simple photo of a plane to get cut out. Then I wanted to out something on the bottom so I found a picture of a plane with some dots showing that it was traveling doing the same thing with the image with putting it into Illustrator. Then I changed the lines on the planes and rectangles to red so when getting to the laser they would be cut out. After doing all that I saved them it to my flash drive. After doing so, I went down to the laser and on the computer to Illustrator and set it up to be printed.

|

|

|

|

|
Final Project

|

|
Water bottle

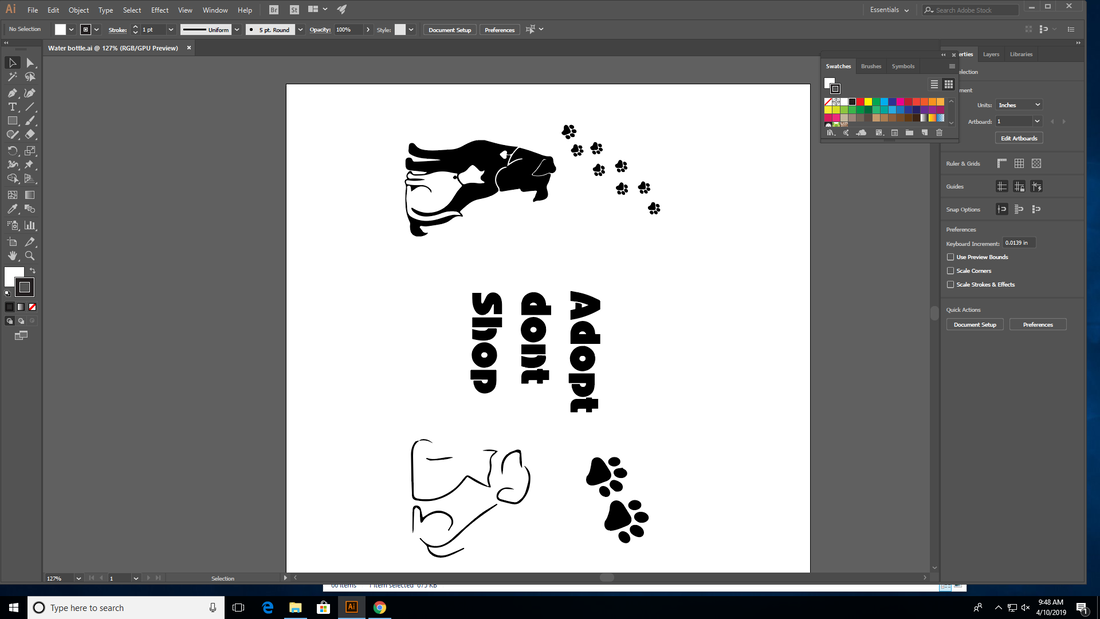
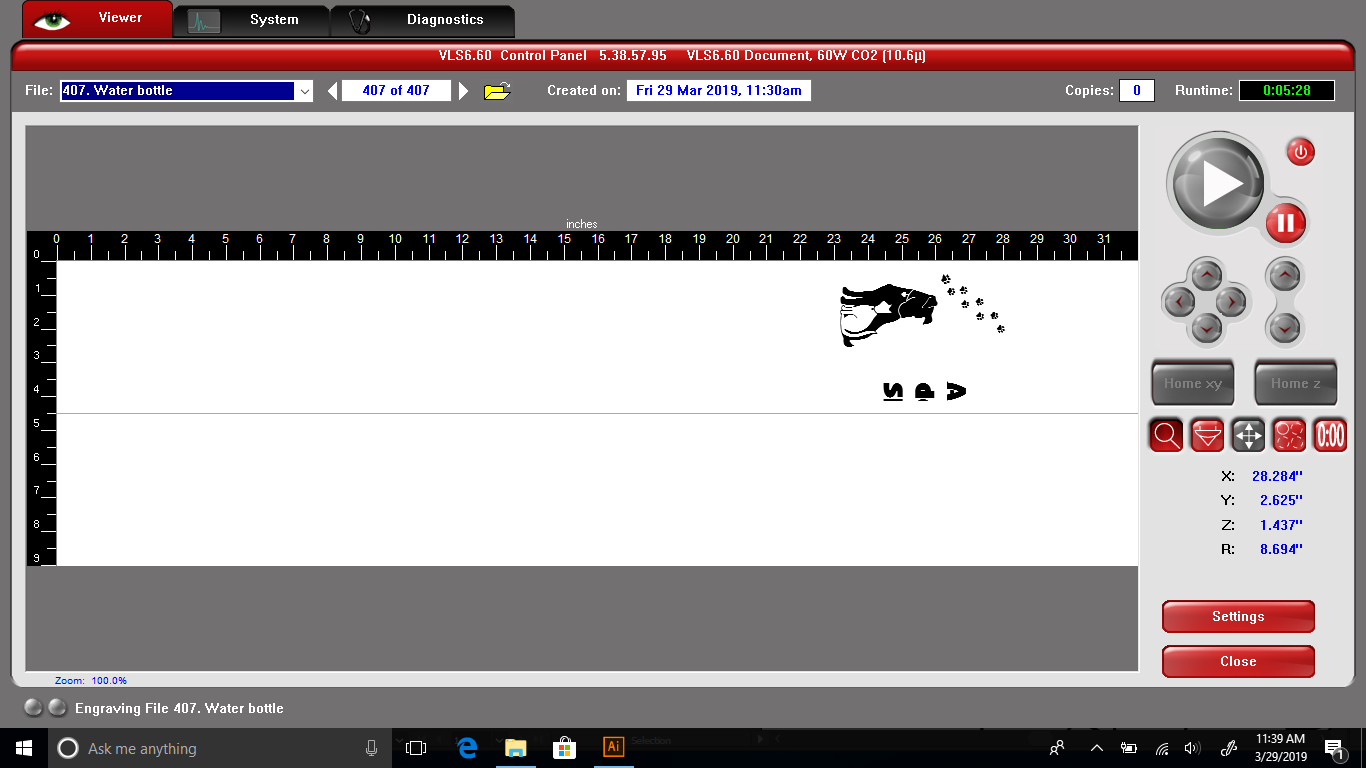
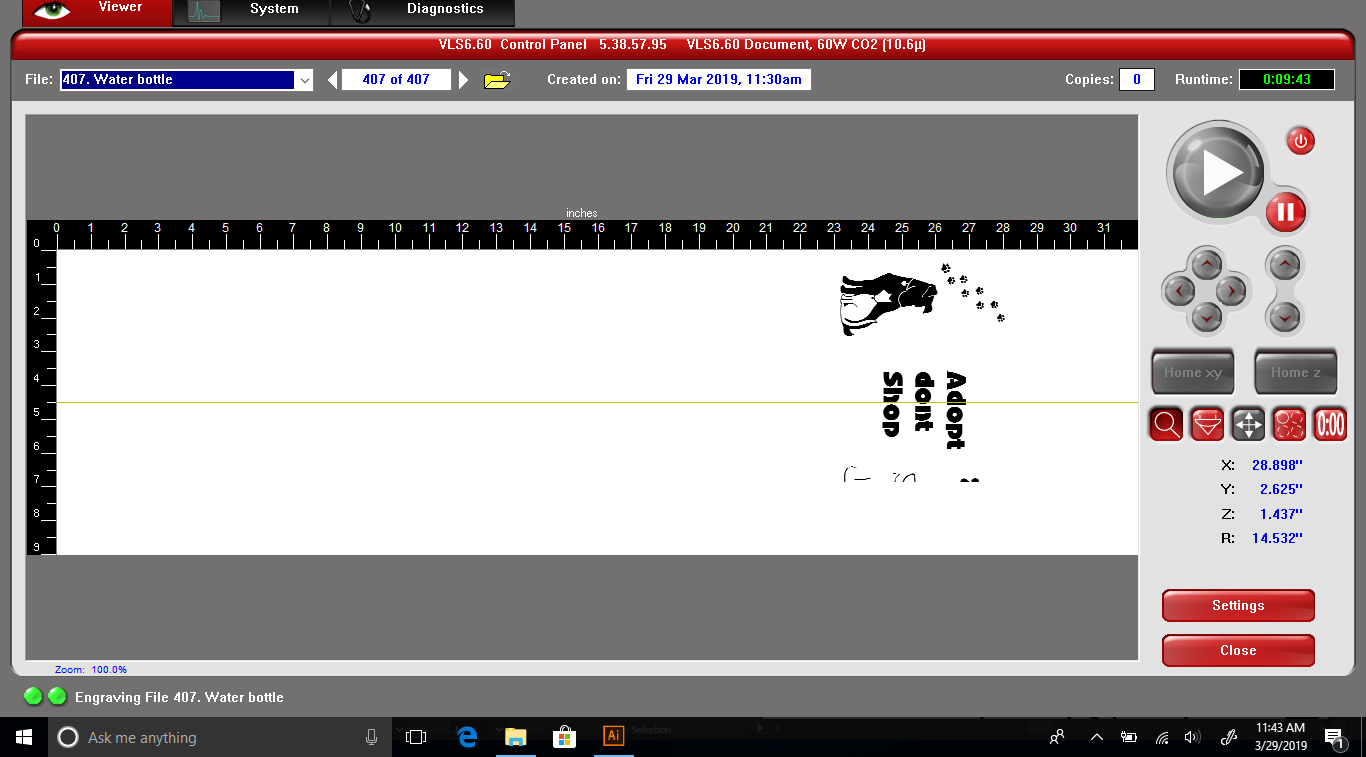
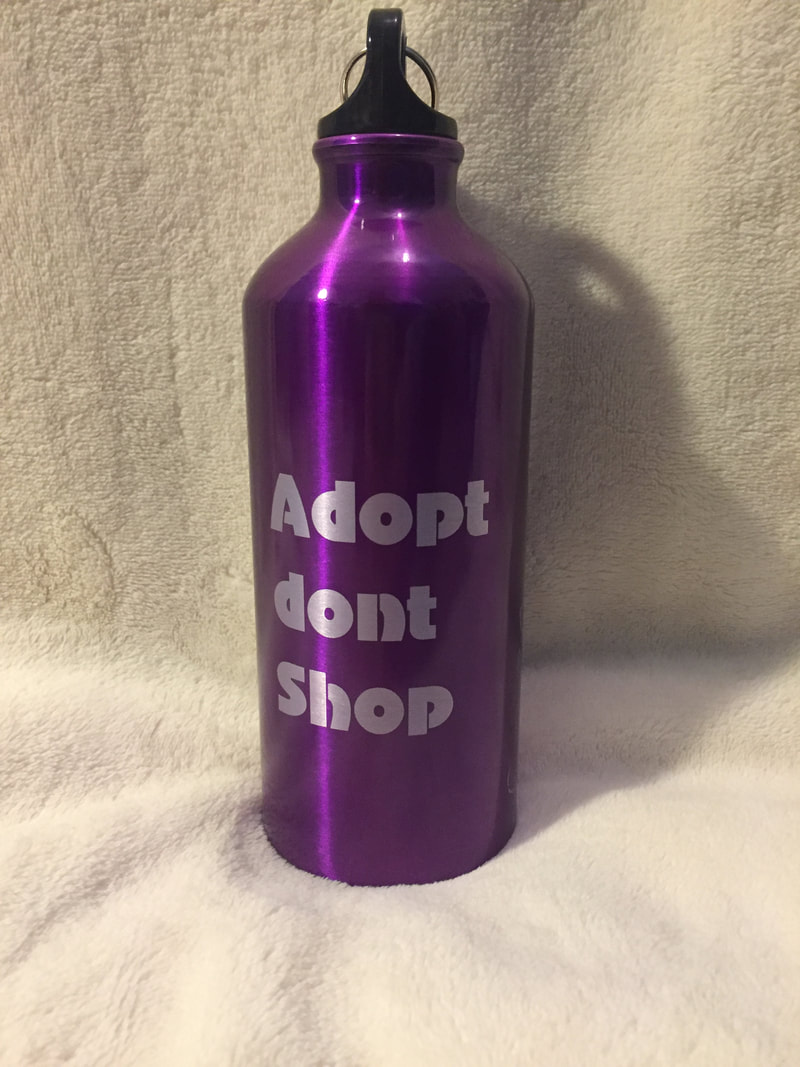
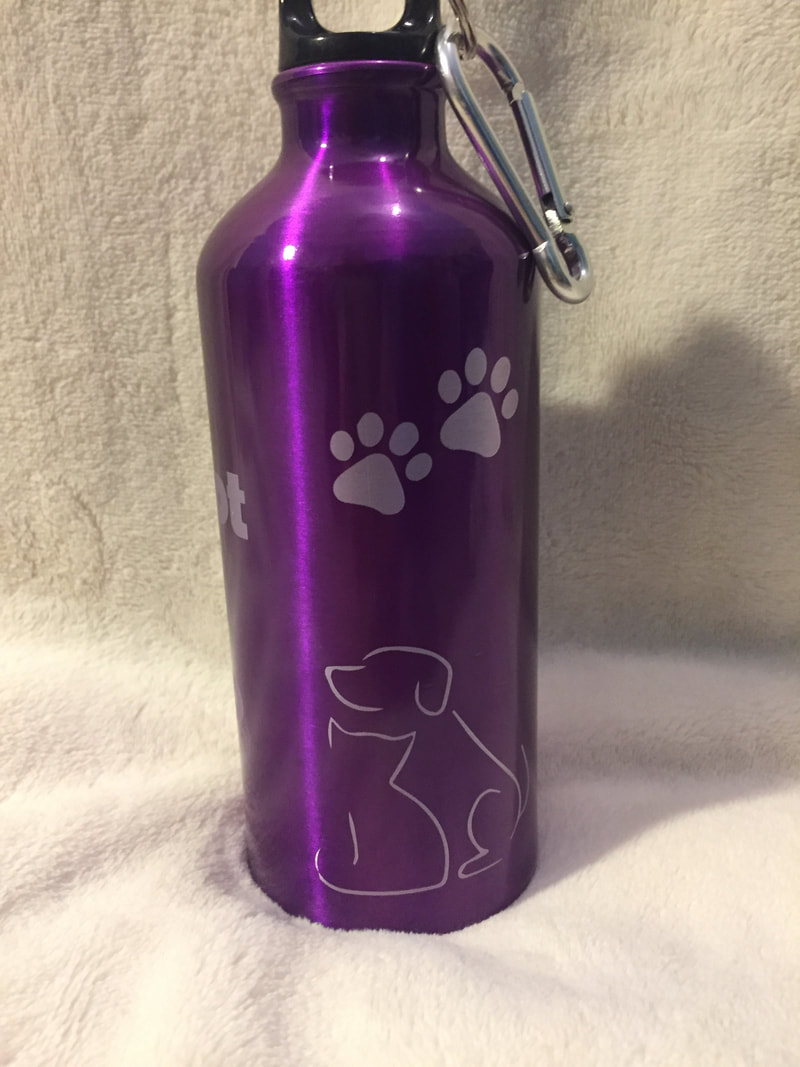
My idea for the water bottle design was to first just be simple with a camp kesem logo on it but there was no black and white logos of it so i was not able to do. My next idea for the water bottle was to do something with dogs. I decided something awareness for dogs in humane societies need adoptions. I wanted to do something different than what my other designs have been. As they have been all similar. Looking at all the photos I was able to put together my idea of what I wanted to say and what kind of photos I wanted to go on the water bottle
To create the water bottle I went onto google find some clip art of dogs and cats. Once i found two that I liked i copied them and pasted them into Illustrator. Then I went back to google and found two photos of dog prints, copied and then pasted them into Illustrator. Then I wanted to put some words in. I put in "Adopt don't shop". I arranged the words and pictures to my liking. Then I had to group them all together and turn them 180 degrees so it would laser right on the water bottle. After doing so I saved it onto my flash drive. Then I went down to the laser, I put the water bottle in the laser and closed it. Then to start on the computer in illustrator and then going through the steps to print it with the laser.


Final Project
Thingaverse |

|
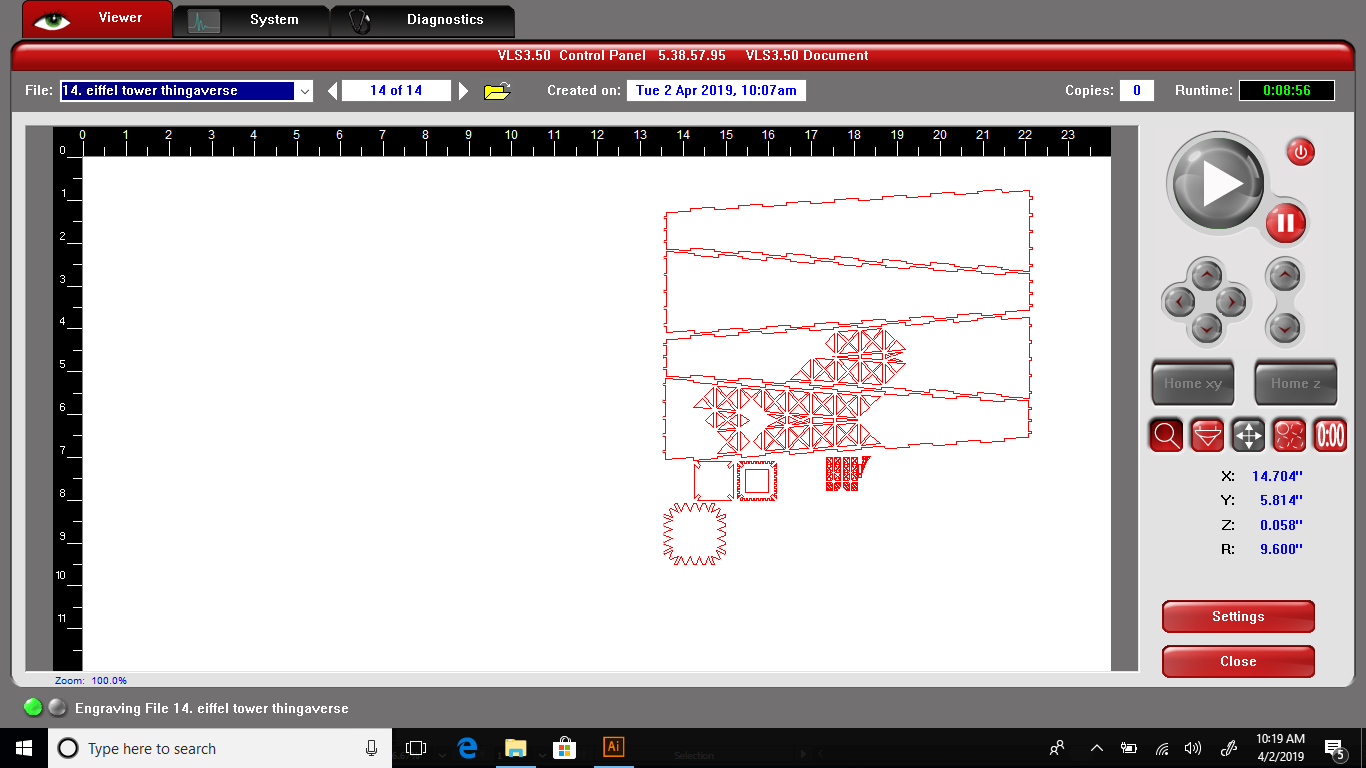
To make this I started with going into the website Thingiverse and finding something to make. After looking for a little bit I decided on the tower. So I saved it and put it into Illustrator. Then saving it to my flash drive. For the mat board I found a grey and white color that I thought would look good for the design. I put the board into the laser. After doing so, I put my into the computer and setting it up to print. After printing I had to do a lot of picking out of inside pieces. Then the building part took a little bit of time to figuring out but I got it eventually.


|

|

Final Project |

|

|

What I Learned
From the water bottle assignment I learned that you need to be careful with the design when it is not on a flat surface. Not putting that into consideration, The water bottle design parts are farther apart then I would have liked them to be. So when looking at the water bottle you see only one or two of the pictures at a time. I wish I had put them closer together to they look more together.
Furthermore, in the Thingaverse assignment I learned was that you need to look at things fully and not just glance at things to check it. When I first found the design in Thingaverse it was the Eiffel Tower which I really wanted to do. So I put it into Illustrator just glancing over the design for it to be cut out on the laser. Although when I put it together I only then had realized that it was only the top part of the Eiffel Tower. It doesn't look weird or anything. It is just more of a tower now.
Furthermore, in the Thingaverse assignment I learned was that you need to look at things fully and not just glance at things to check it. When I first found the design in Thingaverse it was the Eiffel Tower which I really wanted to do. So I put it into Illustrator just glancing over the design for it to be cut out on the laser. Although when I put it together I only then had realized that it was only the top part of the Eiffel Tower. It doesn't look weird or anything. It is just more of a tower now.
